EXHIBITOR GUIDE
RDV CAREERS IT & GENIE
Be prepared
At first…
After registering for the event, you must complete your presentation form (by completing all mandatory fields marked with an *. The more your profile is completed, the more visible you will be. Also remember to fill in your availability and update them so as not to have an appointment scheduled at a time when you would not be available.
In a second step…
Two weeks before the event, your profile will be added to the catalog (you will be notified by email), and you will then be able to make your appointment requests. Select and solicit the candidates you want to meet. Each participant will also have the opportunity to ask you for an appointment: you will just have to accept or decline their proposals.
Before and during the event…
Before the event, you will receive a first appointment schedule with the times of your accepted appointments (you will also be informed by email). The appointment booking remains open until D-day as well as during the event itself. You will receive your final appointment schedule a few days before the event (note that during the event, accepted appointments will be automatically added to your agenda if you are available).

COMMUNICATE YOUR PRESENCE AT THE EVENT!
We put at your disposal different visuals to promote your participation in the event: banners for your website, posts for your social networks etc. Click here to download them
Sign up
Log in to the event registration link.
All fields mentioned with an (*) are mandatory. The more fields you fill in, the more complete your profile will be.
Choose “Recruiter”

Enter your email address.

Enter your password.

• Fill in the fields within the registration process.

YOUR PROFILE
After finalizing your registration, the first thing to do is to fill in your presentation sheet. This is your online showcase: it is via this presentation sheet that candidates will ask you for appointments. The more complete and accurate your profile, the more visible you will be and the more relevant your contacts will be.
To access it, click on “Presentation sheet”:

All the fields mentioned with an * are mandatory so that your registration is validated and your profile is added to the catalog. This allows you to have access to the appointment booking later.
Remember to make all your keywords appear in your descriptions, and to complete the nomenclatures so that the matchmaking proposed by the platform is as relevant and as qualified as possible.
Logo
Add your logo, it will be visible on the catalog.
![]()
Video
You can add a video presentation of your company (Mp4 format, 100 MB max).

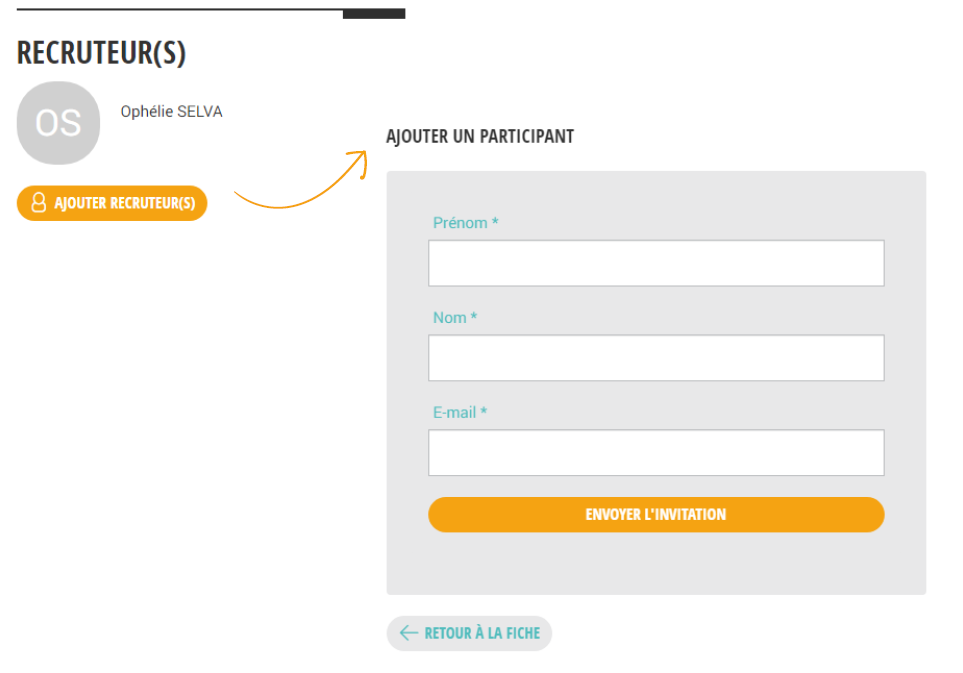
Recruiters
You can edit your profile and add a second recruiter.
If you are not a recruiter but you are in charge of editing your file, two options are available to you
- Complete the form then add your two recruiters and delete your profile
- Complete the form, keep your profile and put your calendar out of work so as not to receive appointment requests.
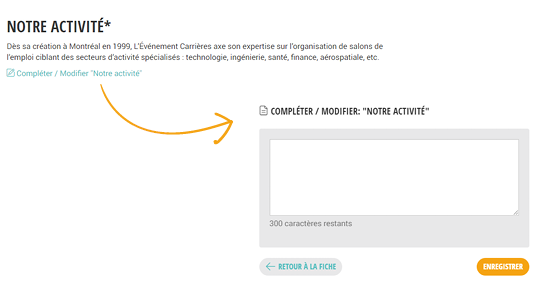
Our activity
You can add a description of your business.
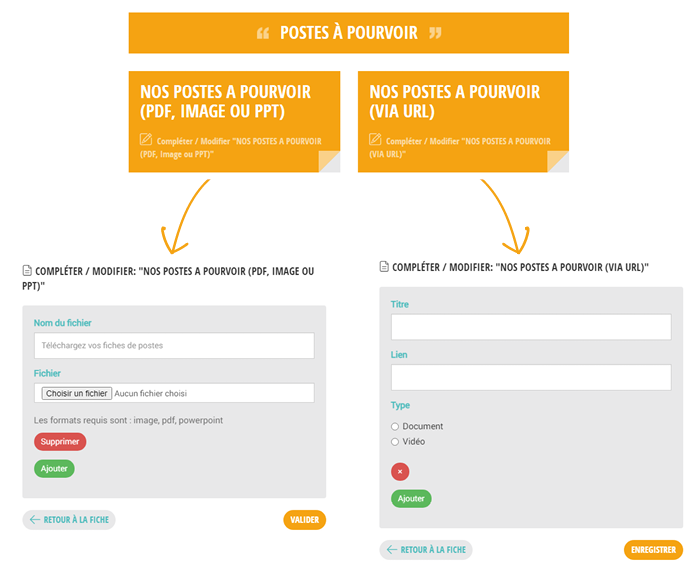
Vacancies
You can add your job offers in PDF, Image, PPT format or add URL links that redirect to your app site.
• System and network administrator
• Business Analyst
• Functional Analyst
• Quality Assurance Analyst
• Programmer Analyst
• Security/Cybersecurity Analyst
• Solution Architect
• Project Manager
• Developer/Integrator
• Computer technician level 1 and 2
• Municipal Engineering Engineer
• Industrial Engineer
• Electrical Engineer
• Project Engineer
• Civil Engineering Technician
• Electrical Engineering Technician
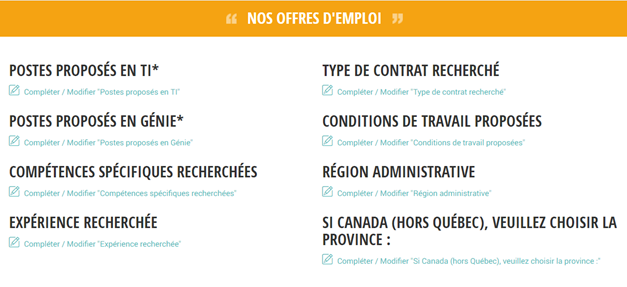
Our job offers
Finally, we invite you to select the criteria corresponding to your job offers so that the matchmaking tool offers you the most relevant candidate profiles.
YOUR AGENDA
This tab allows you to add the moments when the recruiter is not available for appointments.
To access it, click on “My Calendar”:

When you first log in to the “Calendar” tab, you need to set your time zone.
You can add one or more unavailability(s) to your calendar. If you do not add one, we will consider that you are available for the duration of the event.
You then have access to the Global Agenda of your company, summarizing the appointments of all recruiters. As well as to your personal Calendar, by clicking on Participants’ Agenda > Agenda of *your name*.
APPOINTMENTS
In order to make appointments the recruiter must go to the “catalog” tab.
The first time he goes there a message asking him to confirm his availability or to add his unavailability appears.
- By clicking on “confirm availability”, the recruiter accesses the appointment catalogue.
- • By clicking on “add unavailability”, the recruiter is automatically directed to the “calendar” tab so that he adds the moments when he will not be able to make an appointment.
Once he has answered this question he arrives at the catalog where the pop-up “Optimize networking meetings” appears (only the first time!).
SORT CANDIDATE PROFILES VIA FILTERS
By default, the platform brings up the profiles that best match your needs via the filter “by relevance”.“.
You can change this filter by the filter alphabetical order” or by a “recent registrations filter.“.
- The Offers / Needs filter allows you to quickly search for participants who meet your requirements.
EX : If you select the “Programmer Analyst” field, all candidates who have checked this box will appear. - The Keywords filter allows you to quickly search the records and find where those keywords were written.
EX</If you note “Programmer Analyst” in the search field, all profiles with these words in their description will appear.
Therefore the use of one or the other of these filters does not raise the same profiles..
Be careful, if you add these filters, the search results will be reduced because the platform will search and report only the profiles that have checked the box “Programmer Analyst” AND who have written in description “Programmer Analyst”.
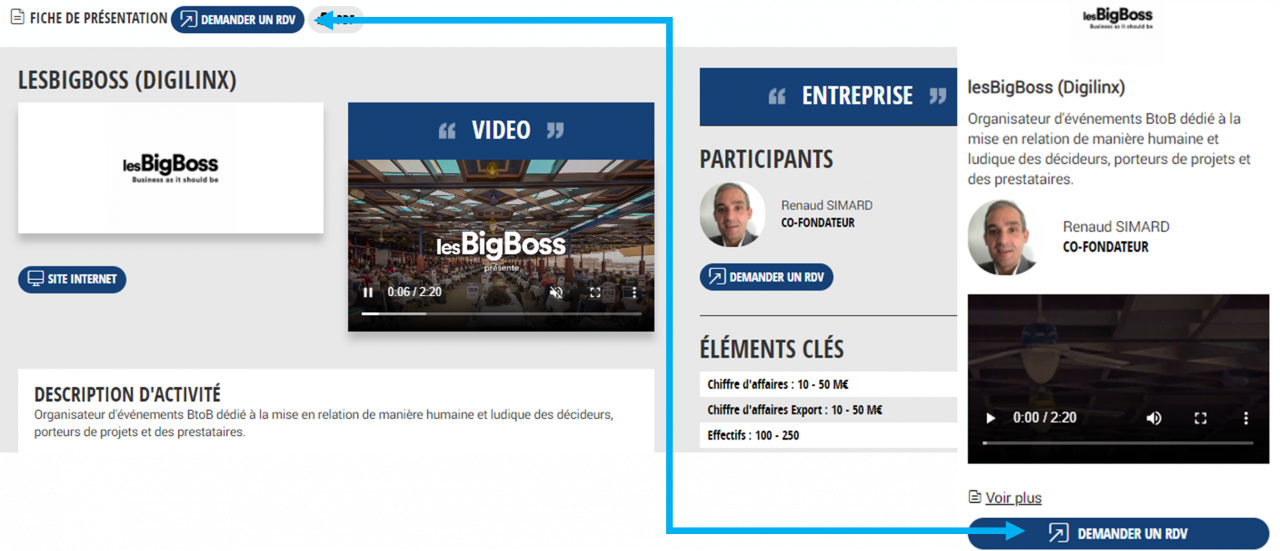
REQUEST AN APPOINTMENT AND/OR CONSULT THE CONTACT SHEET
- If you want to consult in detail the profile of a candidate, just click onSee more»
- You can request an appointment directly via the catalog or via the candidate file you have consulted.
- On the day of the event, you can continue to make requests. If they are accepted, they will be automatically scheduled on your first common availability.
PERSONALIZE YOUR APPOINTMENT REQUEST
In order to make your appointment requests more efficient, you can add A UNIQUE message to your request (limited to 300 characters).
APPOINTMENT MANAGEMENT
Please decline requests that are not of interest to you to avoid receiving reminder emails.
NOTE : Each appointment request accepted, whether or not it gives place to an appointment, will allow you to retrieve the candidate’s contact details, as soon as the event opens.
Thus, in the event that an appointment could not be made, due to the lack of availability of a participant, you will have the opportunity to contact him again.
APPOINTMENT REQUEST PENDING
DAs soon as a participant (exhibitor or visitor) has pending appointment requests, the pop-up “please validate or refuse your appointment requests” appears on all the windows of his profile (catalog, agenda …). This occurs each time the person connects, so as to inform him that he has received new appointment requests.
This pop-up does not appear if the person does not have a request or has already responded to those he had received.
MANAGE PENDING APPOINTMENT REQUESTS
1- Click in the “Appointment management” tab.
2- Respond to the requests received by clicking on« Accept » ou « Refuse ».
3- If there is a small envelope, it means that you have been sent a message.
EDIT APPOINTMENTS FROM THE CALENDAR TAB
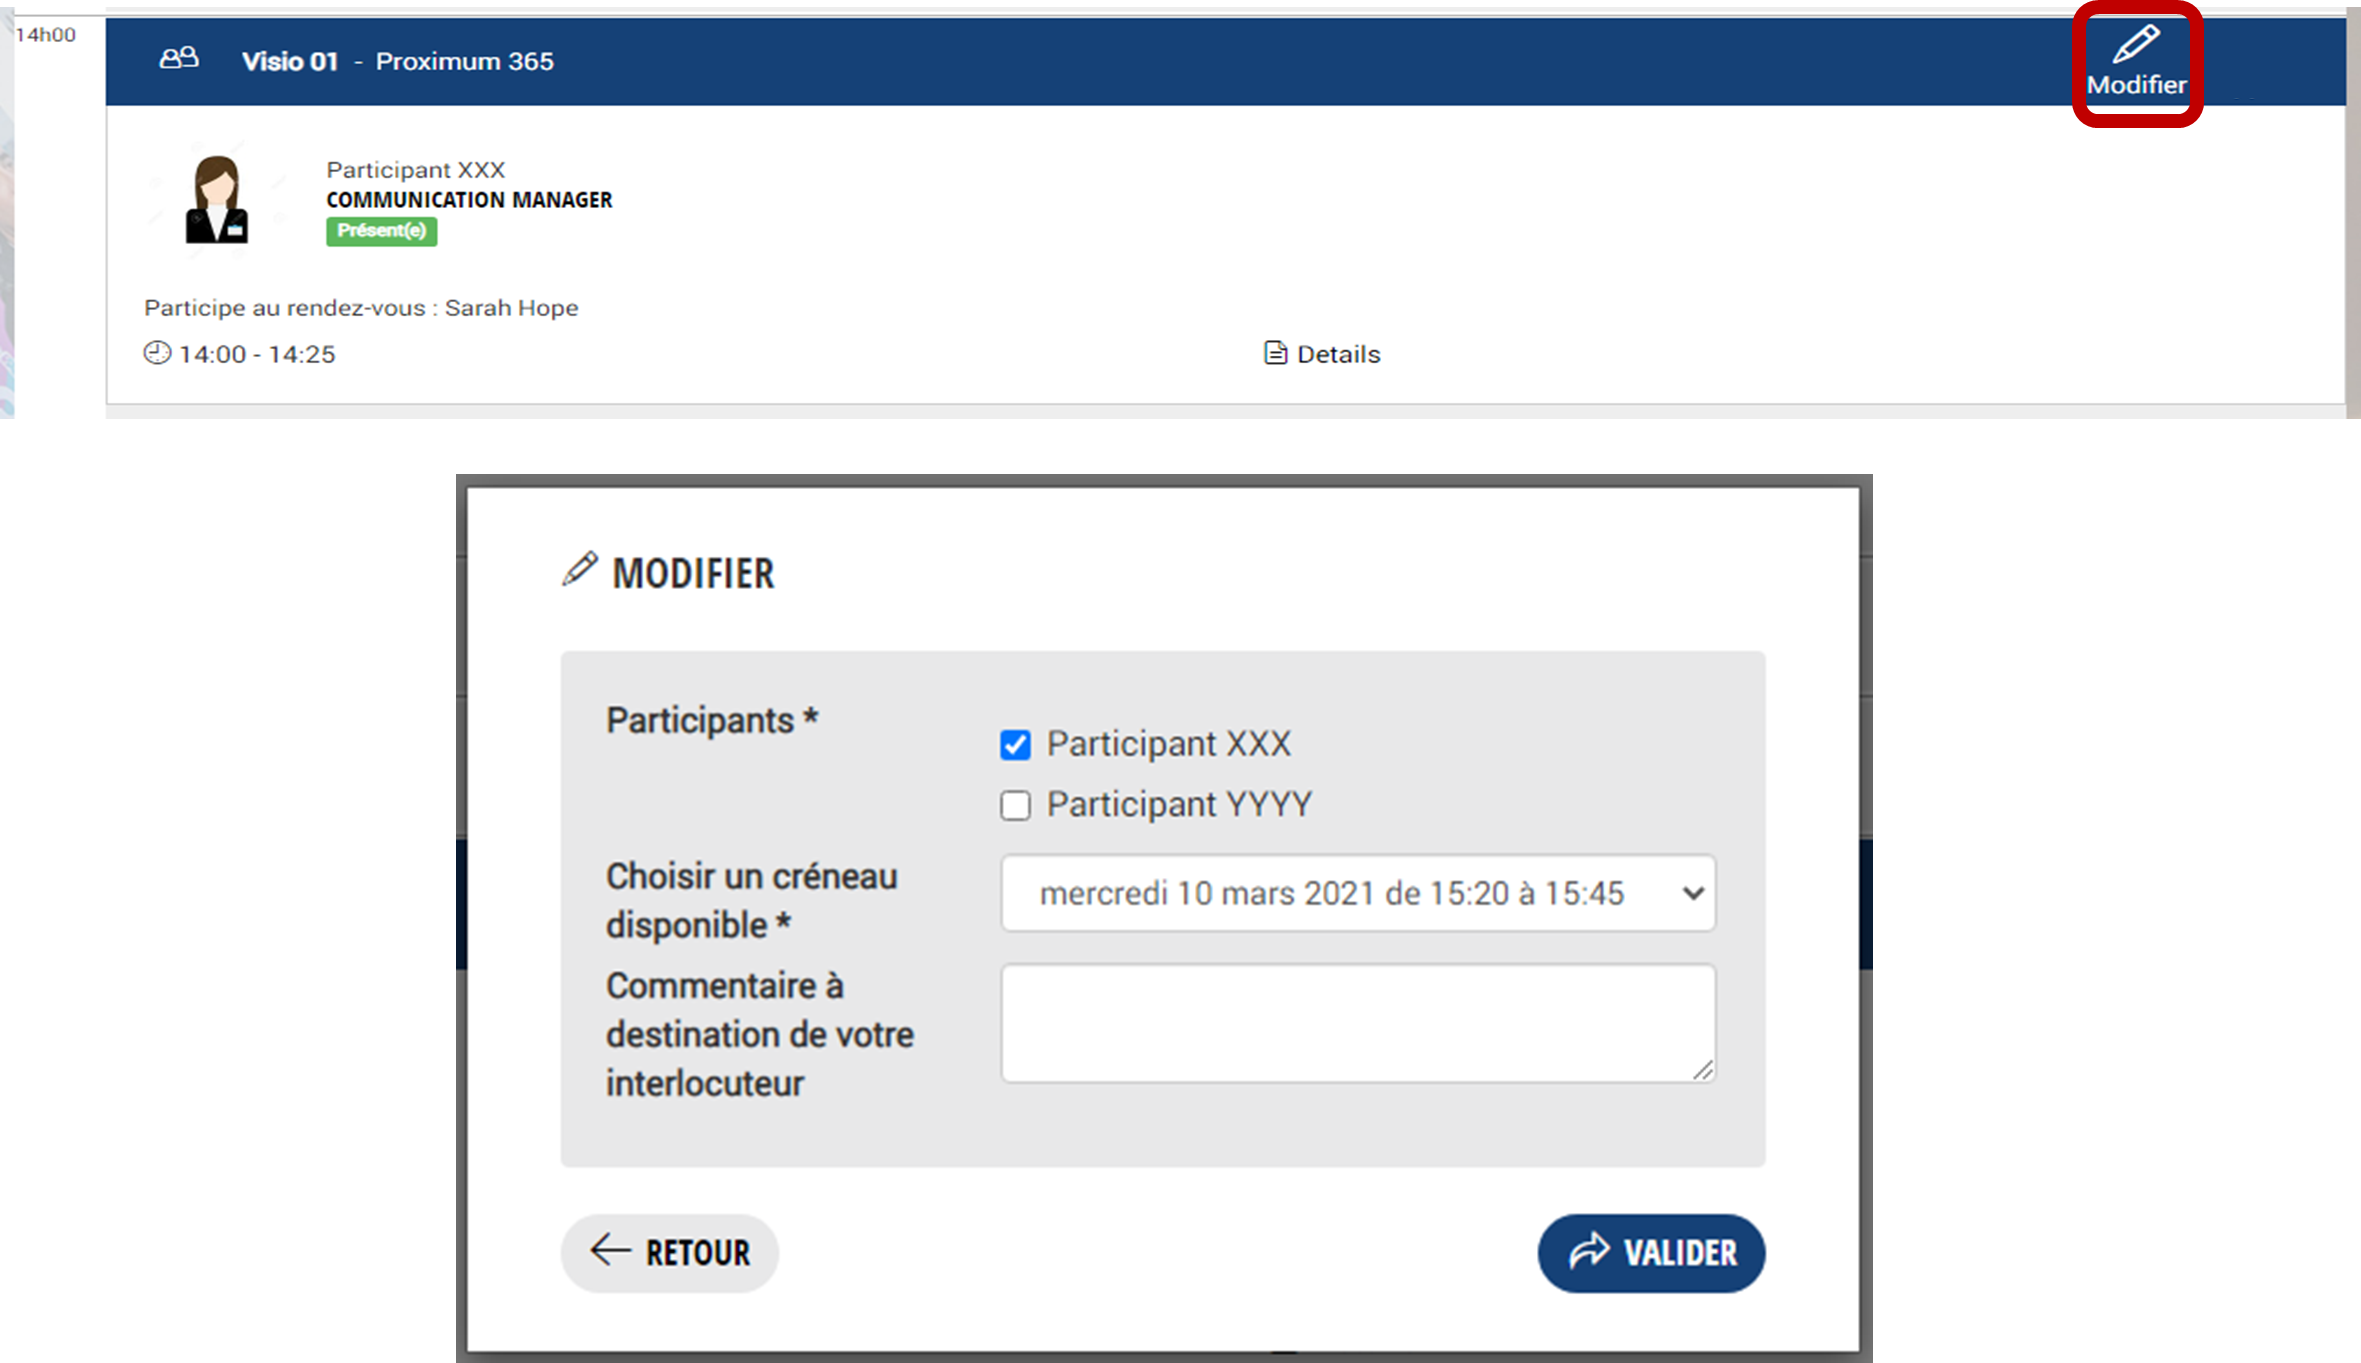
From the calendar tab, you have the possibility to modify your appointments, that is to say to reassign and / or move a positioned appointment.. To do this, click on .Edit » and fill in the window that opens.
Participants: allows you to select the participants who must attend the appointment (be careful, you can only select them if they are available at the time of the appointment).
Choose a slot of available: allows you to move the appointment if you have other slots available.
Comments to your interlocutor: This field is not mandatory, it gives you the opportunity to attach a message to justify your modification.
All you have to do is« Validate » and your modification is taken into account.
If you cannot make your own change (joint availability problem, blocking calendars between you and your colleagues for the reallocation of an appointment), you can contact the organizer by email or via chat.
TECHNICAL CONSTRAINTS
TECHNICAL PREREQUISITES FOR AN OPTIMAL DIGITAL EXPERIENCE
- Make sure your high-speed internet connection is working properly (prefer a wired connection).
- Cut all software that uses sound & camera (Teams, Zoom, etc.)
- Sign in via Google Chrome.
- Have a camera and microphone (use headphones to dampen ambient noise).
- If you’re connecting through your work computer, make sure your firewall isn’t blocking the connection.
TEST MY VIDEO
To access it, click on “Test my video”:
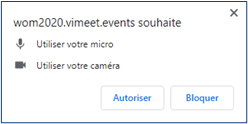
1- CLICK ON "TURN ON YOUR CAMERA AND MICROPHONE"

2- ALLOW ACCESS TO YOUR CAMERA AND MICROPHONE
3- SELECT YOUR EQUIPMENT IF NOT RECOGNIZED AUTOMATICALLY AND CLICK ON "START TEST"
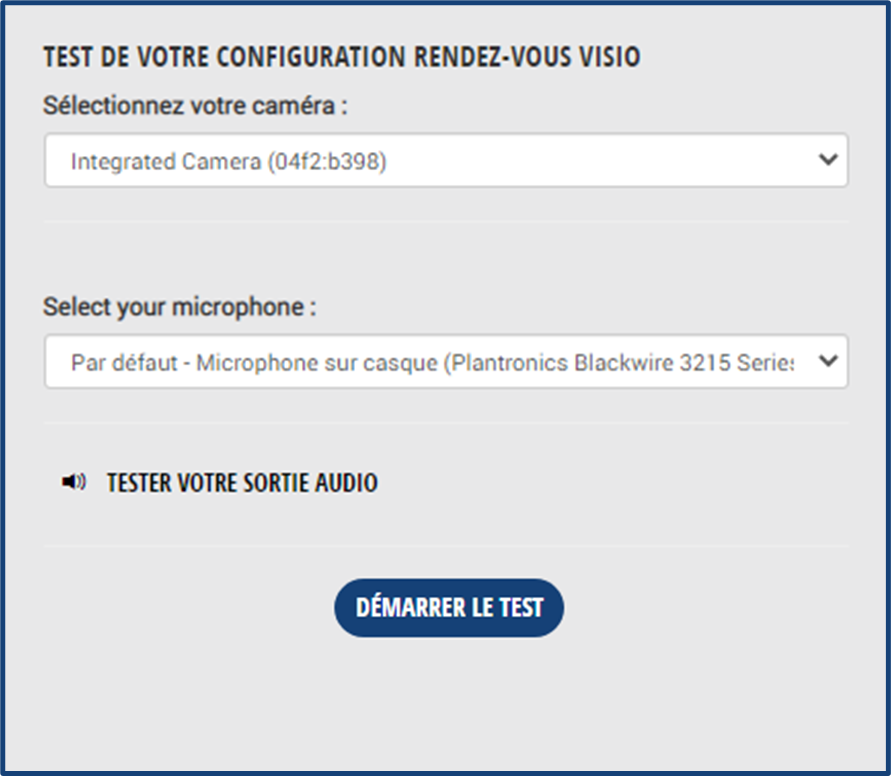
4- THE TEST BEGINS
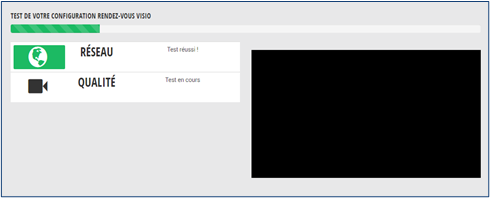
All your indicators are in green, your video test is a success.

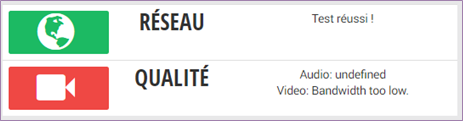
One of your indicators is red: your test is inconclusive, contact technical support via chat.
D-DAY
START AN APPOINTMENT ON D-DAY
Nb. Remember to connect via Google Chrome
- Click on the “Calendar” tab
- If you haven’t already done so, set the “Time Zone”
- If you are several participants on your profile, click on “Participants’ Calendar” then “My Calendar”.
- Click on the appointment
- Click on the “Start” button (it appears only 5 minutes before the start of the appointment and throughout its duration)
NETWORKING
This space allows you to chat between all participants who are connected. There is a general chat and private chats.
GENERAL CHAT
This space allows all participants to exchange. This conversation is visible to everyone.
PRIVATE CHATS
1- Find the person you want to chat with in the search bar of the connected participants area (surname, first name, function, company).
2- Click on this person and send him a message.
3- The person sees a small “1” in a red circle next to the “Networking” tab and next to the “Private Chat” tab to inform him that he has received a message.
REPLY TO A PRIVATE CHAT CONVERSATION
1- Go to the networking area
2- Click on “Private Chat”
3- Click on the conversation
4- Reply to the message(s)
Video call:
You can start a video call with this person.
If the call is not successful, you can ask when the person is available. As soon as this person lets you know they’re available, you’ll be able to restart a videocall.
TECHNICAL ISSUES
If you have a technical problem or a question related to the use of the platform, click on the Chatbox icon at the bottom left to ask your questions
AFTER THE EVENT
DOWNLOAD YOUR CONTACTS
At the end of the event, you will be able to download all the contact details of the participants with whom you have had accepted appointments, whether they could have been scheduled or not.
In addition, if you make video calls with participants, via the “Networking” tab, their contact details will be added to this downloadable file.
WRITE DOWN YOUR APPOINTMENTS
At the end of each appointment, you have the option to rate it and leave comments, which will be added to your downloadable file in front of the contact concerned.
You can also do this via the “contact” tab of your menu bar, then by clicking on the contact you want to qualify.
This rating remains completely confidential.